Getting Started with React Native: A Step-by-Step Guide to Creating a To-Do App


Table of contents


No headings in the article.
React Native is a popular framework used to create Android as well as IOS apps
In this blog post, we can walk through how we can initialize a react native project and then build a todo app
First of all, check if you have installed the
java by typing
java --version
as long as we get a version of java it won't be a problem
since I am using windows it will display like below

and check if adb and SDK is installed properly link to the installation here
check the adb version by typing
adb --version
it will show something like this

turn on the developer option in your android app by clicking Build Number multiple times
Settings > About phone > Software information > Build number
or by
Settings > About phone > Build number ( Stock android )
then turn on the USB Debugging on your phone by clicking
Settings > Developer options > USB debugging
then connect your device to your PC then make sure it's connected as transferring media and files
then on your terminal type
adb devices
it will list all the devices that is connected to your PC

initialize the react native project by typing
npx react-native init todo
here todo is my app name feel free to change the app name if you want
then change the directory todo by typing
cd ./todo
then open the editor of your choice I use VSCode for that
the on your terminal type
npx react-native run-android
probably a new window will popup some thing like below if you have installed all the requirements properly

Press a to run on android
probably you might be facing some issues like

if not then Good for you
to find the proper issue you can scroll a little up in your terminal until you find something like
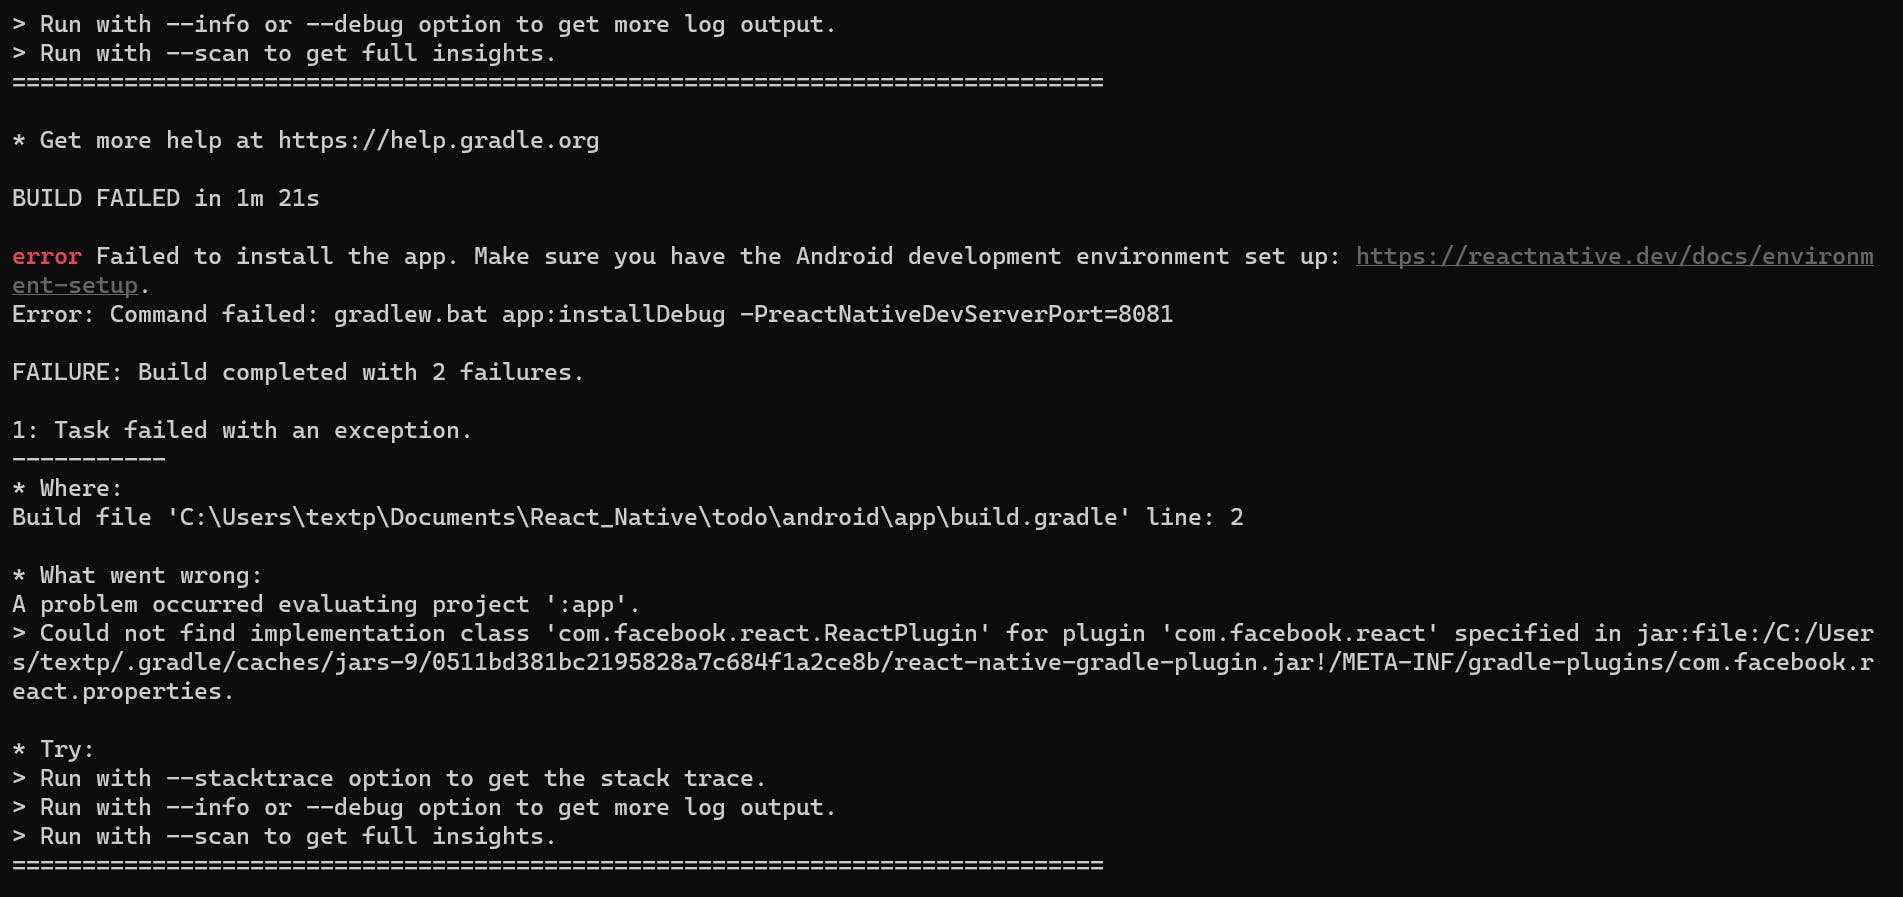
here you can find some errors mentioning likecompileSdkVersion is not specified. Please add it to build.gradle
to fix this issue open the project in the editor of your choice I use VSCode you need to create a file called local.properties inside the android folder
then
org.gradle.java.home = C:\\Program Files\\Java\\jdk-19
sdk.dir = C:\\Users\\textp\\AppData\\Local\\Android\\Sdk
here org.gradle.java.home is assigned to the java installed in your local machine and sdk.dir is assigned to the SDK installed in your local machine
then delete the node_modules the folder then reinstall it by typing
npm i
in your terminal which is the short form of npm install.
then again try to run
npx react-native run-android
then Press a
you might be seeing the app building successfully something like
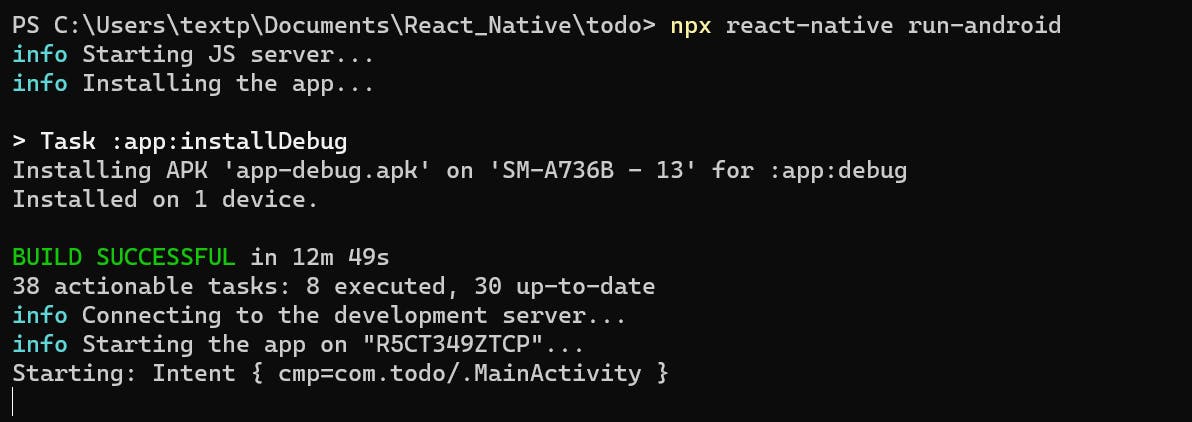
and the app opens on your Phone.
Create an src/components folder in your in you root directory
the create a Todo.tsx file in your components folder
import { Text, View } from 'react-native'
import React from 'react'

export default function Todo() {
  return (
    <View>
      <Text>Todo</Text>
    </View>
  )
}
here we create a called Todo and export it.
we import View, Text from react-native and React from react.
View is a container that supports layout with flexbox, style, some touch handling and accessibility controls flexbox.Text is a Core Component in React Native it's the same as the input type="Text" in HTML it allows users to enter the text.
then in your App.tsx
import { View, Text } from 'react-native'
import React from 'react'
import Todo from './src/components/Todo/Todo'

export default function App() {
  return (
    <View>
      <Todo />
    </View>
  )
}
This Just Shows a Text Todo in your app screen. Now lets us build the app
Now Lets Start Building some layouts
import React from 'react';
import { View, Text, TextInput, Button, StyleSheet } from 'react-native';

export default function Todo() {
  return (
    <View style={styles.container}>
      <Text style={styles.title}>To-Do List</Text>
      <View style={styles.inputContainer}>
        <TextInput
          style={styles.input}
          placeholder="Enter a to-do item"
        />
        <Button title="Add" />
      </View>
    </View>
  )
}

const styles = StyleSheet.create({
  container: {
    flex: 1,
    padding: 20,
    backgroundColor: '#f0f0f0',
  },
  title: {
    fontSize: 24,
    fontWeight: 'bold',
    marginBottom: 20,
  },
  inputContainer: {
    flexDirection: 'row',
    alignItems: 'center',
    marginBottom: 20,
  },
  input: {
    flex: 1,
    borderWidth: 1,
    borderColor: '#ccc',
    padding: 10,
    marginRight: 10,
    borderRadius: 5,
  },
})
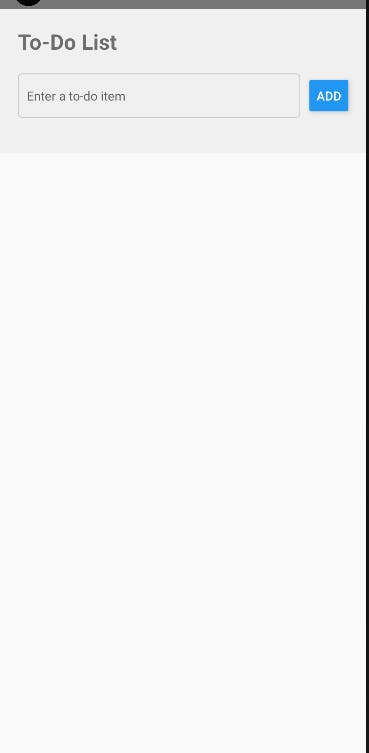
This will Build a simple UI like below
now lets add the add functionality to our todo app.
import React, { useState } from 'react';
import { View, Text, TextInput, Button, StyleSheet } from 'react-native';

const Todo = () => {
  const [todos, setTodos] = useState([]);

  // state to keep track of the new to-do item
  const [newTodo, setNewTodo] = useState('');

  // function to add a new to-do item
  const addTodo = () => {
    setTodos([...todos, { text: newTodo, completed: false }]);
    setNewTodo('');
  };

  return (
    <View style={styles.container}>
      <Text style={styles.title}>To-Do List</Text>
      <View style={styles.inputContainer}>
        <TextInput
          style={styles.input}
          value={newTodo}
          onChangeText={setNewTodo}
          placeholder="Enter a to-do item"
        />
        <Button title="Add" onPress={addTodo} />
      </View>
      {todos.map((todo, index) => (
        <View key={index} style={[styles.todoItem, todo.completed && styles.completedTodo]}>
          <Text style={styles.text}>{todo.text}</Text>

            <View>
              <Button title="Complete"  />
            </View>


            <View style={styles.deleteButton}>
              <Button title="Delete" />
            </View>

        </View>
      ))}
    </View>
  );
};

const styles = StyleSheet.create({
  container: {
    flex: 1,
    padding: 20,
    backgroundColor: '#f0f0f0',
  },
  title: {
    fontSize: 24,
    fontWeight: 'bold',
    marginBottom: 20,
  },
  inputContainer: {
    flexDirection: 'row',
    alignItems: 'center',
    marginBottom: 20,
  },
  input: {
    flex: 1,
    borderWidth: 1,
    borderColor: '#ccc',
    padding: 10,
    marginRight: 10,
    borderRadius: 5,
  },
  todoItem: {
    flexDirection: 'row',
    alignItems: 'center',
    justifyContent: 'space-between',
    backgroundColor: '#fff',
    padding: 10,
    borderRadius: 5,
    marginBottom: 10,
    shadowColor: '#000',
    shadowOffset: {
      width: 0,
      height: 2,
    },
    shadowOpacity: 0.25,
    shadowRadius: 3.84,
    elevation: 5,
  },
  completedTodo: {
    backgroundColor: '#d3d3d3',
  },
  text: {
    flex: 1,
    fontSize: 18,
  },
  completedText: {
    flex: 1,
    fontSize: 18,
    textDecorationLine: 'line-through',
    color: '#000',
  },
  deleteButton: {
    marginLeft: 10,
  },
});

export default Todo;
In the addTodo function, we're updating the todos state by adding a new object to the existing array.
We first create a new array by spreading the existing todos array using the spread operator (...todos). We then add a new object to this new array that represents the new task.
The new task object has two properties: text, which contains the text of the new task (i.e., the value of the newTodo state variable), and completed, which is set to false by default.
Finally, we reset the newTodo state variable to an empty string so that the input field is cleared after adding a new task.
To mark our Todo as completed we can now add a function that take the index as the parameter
  const markTodoComplete = (index) => {
    const newTodos = [...todos];
    newTodos[index].completed = true;
    setTodos(newTodos);
  };
and change our views like below
        <View key={index} style={[styles.todoItem, todo.completed && styles.completedTodo]}>
          <Text style={todo.completed ? styles.completedText : styles.text}>{todo.text}</Text>
          {!todo.completed && (
            <View>
              <Button title="Complete" onPress={() => markTodoComplete(index)} />
            </View>
          )}
          {!todo.completed && (
            <View style={styles.deleteButton}>
              <Button title="Delete"  />
            </View>
          )}
        </View>
similarly, for the delete we can add deleteTodo function takes an index as an argument, which corresponds to the index of the task that we want to remove from the todos array.
To remove the task from the array, we first create a new array by filtering out the task with the specified index. We do this using the filter array method.
After creating the new array, we update the todos state variable with this new array using the setTodos function.
This will cause React to re-render the component with the updated state, which will result in the deleted task being removed from the list of displayed tasks.
and trigger the deleteTodo function by clicking the delete button
            <View style={styles.deleteButton}>
              <Button title="Delete" onPress={() => deleteTodo(index)} />
            </View>
now our app will be looking like

our Todo App have been successfully built now let's learn how we can build the release version of our app
to build the APK of our app checkout to android folder in your project in your terminal then just simply type
./gradlew bundleRelease
this will bundle all the JavaScript needed to run your app into the AAB (Android App Bundle). After the build is successful in you can see the APK inside android\app\build\outputs\apk\release\app-release.apk in your Project Folder
building a todo app in React Native can be a great way to learn the basics of building mobile apps with React Native. Through this project, you can learn how to work with React Native components, state, and props. You can also learn how to use common React Native tools like the TextInput and Button components to create interactive user interfaces.
Additionally, you can extend the app by adding new features such as sorting tasks by priority, adding due dates and reminders, and integrating with cloud storage or a backend database to persist the data.
We hope this tutorial has helped get you started on building your own React Native todo app. With some creativity and hard work, you can build an app that is both fun and useful. So go ahead and give it a try!